Learn about the lessons I discovered doing my first thrift flip as a beginner.
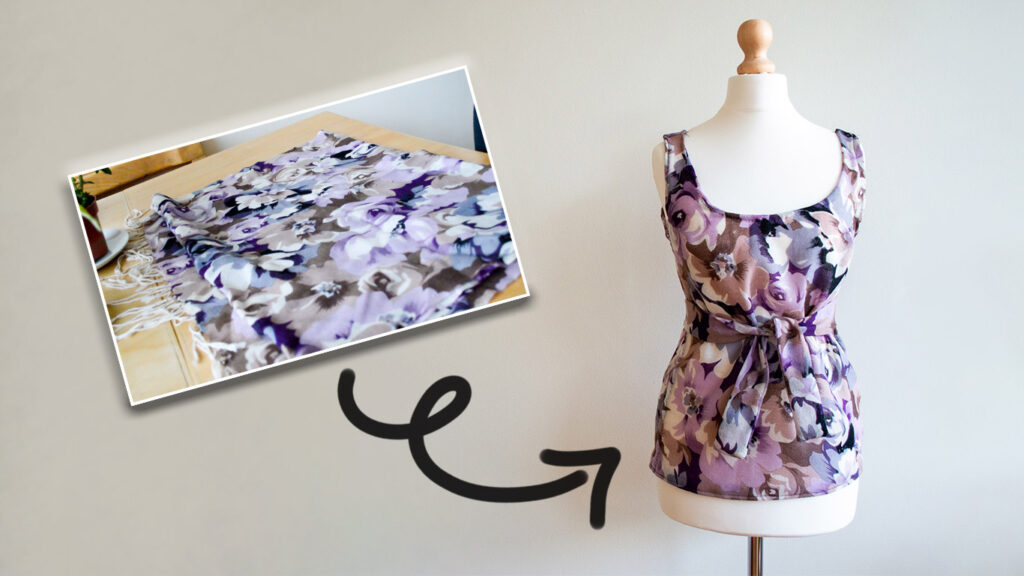
My first project was to turn a scarf into a top. I thought it would be easy enough as it includes no zipper or buttons and only involves sewing the sides and top together.
Even though the project was pretty straight forward, I still made a lot of mistakes and I want to share them with you so you don’t have to make them.
You can also watch my video to follow the progress on this project from the start until the finished product.
1. Choose your fabric right
The main objective of this series of thrift flips is for me to learn how to sew. I find it daunting to work on brand new fabric when I have no clue what I’m doing, I don’t want to waste it.
So I bought a €2 scarf in a thrift shop to work on and practise to build my skills.
While that is a good idea to practise for cheap, I learnt the hard way that the fabric you choose matters.
I bought a thin fabric that was quite fragile and wouldn’t bend properly. Every time I cut it, threads would come out of it and make a mess as well as making it hard to sew.
Choose a stiffer thicker fabric that’s easier to work with.
2. Plan before you cut
Because my fabric was thin and tended to unravel, the small margins I cut in the beginning became even smaller by the time I needed to sew them.
To be fair, I started this project to jump right in and start instead of overthinking. So the point was to cut and do something.
Now I just need to find a balance between never starting and starting a bit too hastily.
Before you cut, think about the shape, the length, the waist, how much you’re going to need to sew and fold the fabric, etc.
Have a plan and then get cutting.
3. Have an iron nearby
My lazy self thought she could get away with winging it. The truth is it’s way more efficient to iron your fabric before you cut or sew than not.
Sure carrying the iron and table and plugging it is a small effort but it’s so worth it in the long run.
Firstly because your fabric will obey you better if you press it into place.
Secondly, you will have better results if you work on a straight fabric than a wrinkly one.
Help yourself out and iron your fabric before you cut and sew.
4. Finishing touches take the longest time
Hems are time-consuming. This is the biggest learning curve in this project.
They take the longest when they have the least impact.
Sure if you don’t do your hems properly, your project won’t look polished.
But it’s hard to believe that 80% of your time is going to be spent on hems alone.
It is worth it though. Good hems increase the longevity of your product and they give a polished look without threads flying left and right.
Do it but be prepared that it might take longer than you’d expect.
5. Ask someone for advice
I wish I asked my grandma for her input from the beginning. I lost so much time trying to figure things out and doing things my way.
My objective was to learn, so I figure what better way to learn than to do it myself?
The reality is that even with some advice, I would still be learning but it would allow me to do so in a more efficient way.
Why work with archaic methods when you can directly practise efficiently.
Asking someone brings their experience to your project and it will make things easier and smoother for you.
Learning to sew is a wonderful thing but it takes time. Start with your first thrift flip today to practise and take the first step towards building a new valuable skill.
You can learn more on thrifting itself in my post right here.
Check out my video following along this project from beginning to end here.